You’ve started taking action on your dream of starting an online business, but every time you sit down to your computer, a sense of dread creeps over you – you have to open WordPress. Ugh. Can’t we just fast-forward to the point when you can outsource all this website tech nonsense?
While that would be nice, it’s so important and empowering to be able to manage your own website. After all, you don’t want to have to call someone for help every time you need to add a page to your site, update your services, or expand its functionality.
Even if you had someone else build your website for you, you should be able to operate it yourself. Otherwise, you’ll have to continue investing in website help unnecessarily.
There’s no sense in having a website you don’t know how to use! And while WordPress might seem intimidating if you’re a beginner, I promise, it’s extremely intuitive and easy to use when you get the hang of it.
In this WordPress tutorial for beginners, I’ll be sharing everything you need to know about the WordPress dashboard. Rather than just taking you on a tour of WordPress, I’ll show you how to do some of the most important tasks you’ll need to do as a website owner.
Ready to spend less time stressing about the tech and more time growing your online business? Let’s get started.
Disclaimer: We are proud affiliates for some of the products mentioned in this post. If you make a purchase after clicking on these links, we’ll receive a commission at no extra cost to you. We only recommend tools we’ve tried, tested, and loved.
The Ultimate WordPress Tutorial for Beginners: A Guide to the WordPress Dashboard
For the purposes of this WordPress tutorial for beginners, I’ll assume you already have WordPress installed on your website’s hosting server.
To log into your WordPress dashboard, you can either:
- Log in through your hosting provider account, or
- Go to https://yourwebsite.com/wp-admin
You can think of your WordPress dashboard as the “backend” of your website. It houses the framework and settings that make your website look and work how it does on the front end.
When you first log into WordPress, you’ll land on your WordPress dashboard.

Depending on your theme, the plugins you have installed, and a few other factors, your WordPress dashboard will look different from my own.
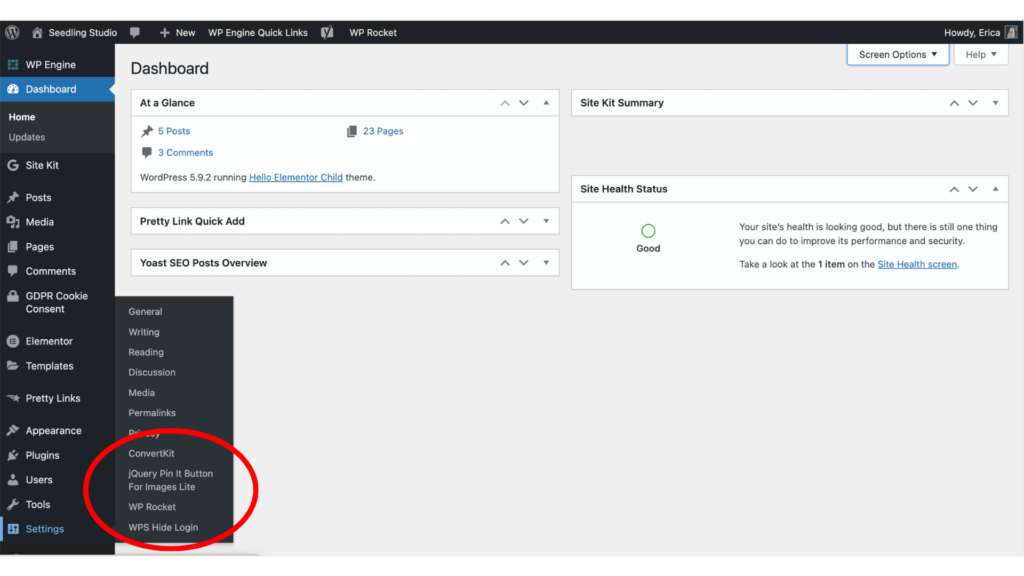
You can control which information you see on this dashboard by clicking on the Screen Options tab in the upper right corner of your window. From there, uncheck any plugins you don’t want to see on your WordPress dashboard.
I like to keep this view simple with just the essentials to help avoid overwhelm!
The left-hand panel of your WordPress dashboard contains links for navigating through your website’s backend.
When you install certain plugins and themes, they may create new menu items on this left-hand panel. Sometimes, they’ll be added as a top-level menu item; other times, you’ll find them nested under Settings or Tools.
Adding Themes and Plugins to WordPress
Every WordPress website runs on a theme. A WordPress theme is essentially the framework that makes your website look and function a certain way.
Rather than having to code your website from scratch (no thanks!), a theme gives you a starting point for you to add content to your website.
To choose a WordPress theme for your website, navigate to Appearance > Themes.
Here, you’ll see all of the themes you have installed on your website. You can install multiple themes, but only one theme will be active on your website at a time.
To add a new theme, click Add New.
From there, you can either choose a free theme from WordPress’s theme library, or you can upload a theme by clicking Upload Theme.
Choosing a theme tends to trip a lot of people up! When I was choosing a theme for my first website (a travel blog), I felt so overwhelmed and unsure of how to pick one. I was captivated by the websites of other people I’d seen who were successful bloggers and entrepreneurs, and I wanted a website that looked like theirs.
I remember piecing together one of the free WordPress themes and being so disappointed in its limitations. In my head, I knew how I wanted my website to look. But at the time, I didn’t know how to execute that vision.
A few years later, I was introduced to the Divi theme – and it changed everything. It’s a no-code theme that turns WordPress into a drag-and-drop builder! Ever since then, Divi has been the WordPress theme I’ve recommended to all new entrepreneurs, businesses, and bloggers.

After uploading or installing your theme of choice, click Activate. This will make the theme live on your website!
Next, you can extend the functionality of your WordPress theme by installing WordPress plugins. There are a variety of different types of plugins. Here are a few examples of what plugins can do:
- Improve your website speed and performance
- Add Google Analytics to your site, so you can understand your website traffic and which pieces of content are performing best
- Make your website more secure
- Improve your website’s SEO so more people will be able to find it
- Add social sharing buttons to your content
Adding a plugin to your WordPress website is similar to adding a theme. Simply navigate to Plugins > Add New. Then, use the search bar to find the plugin you’re interested in.
When you’ve found a plugin you want to install, click Install Now. Wait for the plugin to finish installing; then click Activate. You can configure your new plugin by finding its menu item in the left-hand panel of your WordPress dashboard.
Customizing Your WordPress Theme
You’ve installed your WordPress theme, and now it’s time to make your website your own. No matter which WordPress theme you choose, adding your own customizations will improve brand recognition and will make your site stand out from the pack.
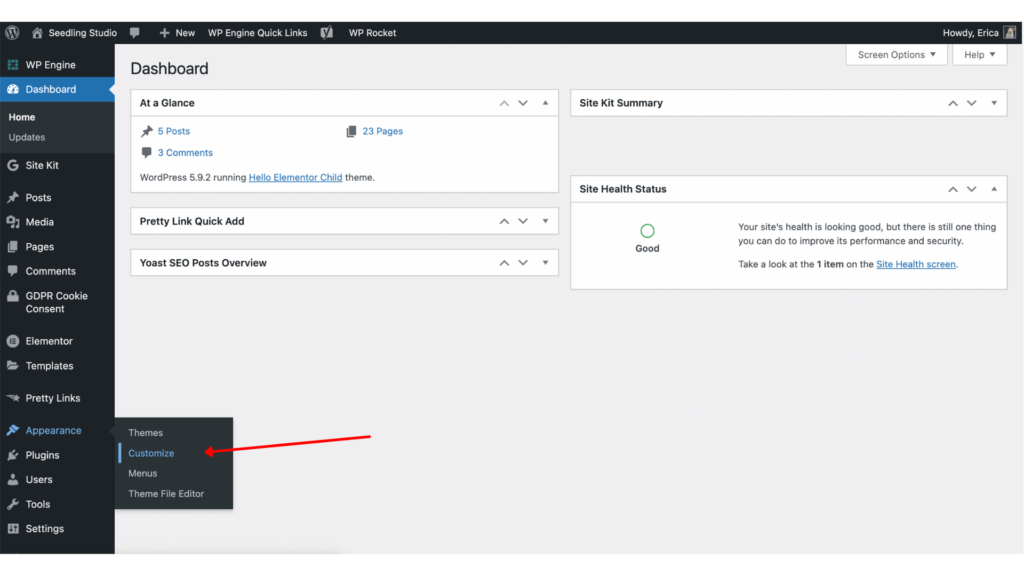
To add your brand’s colors, logo, typography, and other branding elements to your website, navigate to Appearance > Customize.
Depending on which theme you’ve chosen, there may be certain limitations to which aspects of your website you can customize here.
I recommend clicking through every option in the customization panel and changing the settings to fit your brand. When you’re finished, be sure to click Publish!
Editing WordPress Menus
Not knowing how to change a certain part of your website can be so frustrating. I once spent hours scouring through my WordPress backend, trying to figure out where to change the bit of text below my footer.
I don’t want that to happen to you! Usually, menus tend to be less intuitive for WordPress beginners to edit. That’s because the Menus option is nested under the Appearance menu:
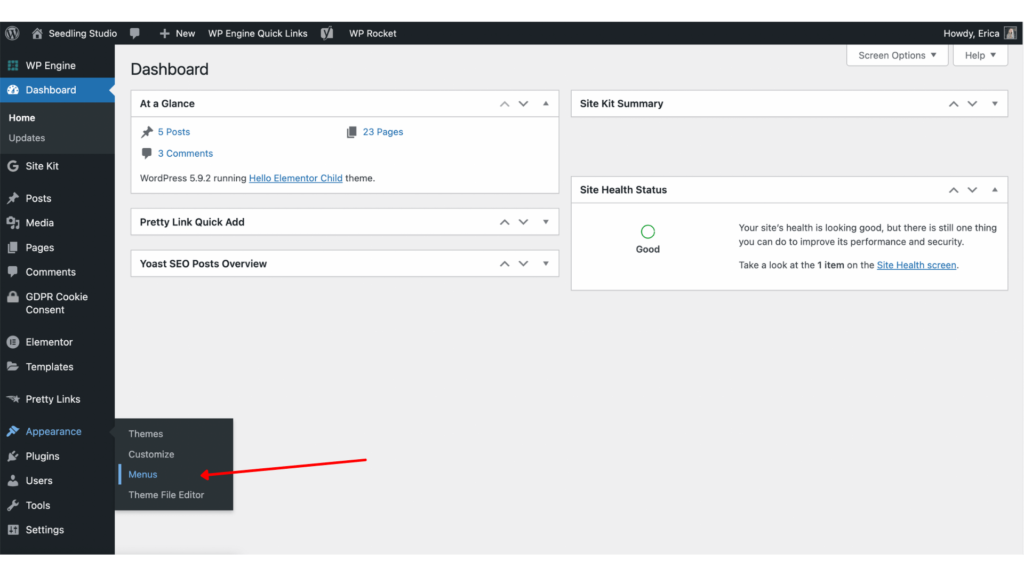
Once you’ve accessed the Menus dashboard, you can edit an existing menu, create a new one, or manage your menus’ locations.
Often, people will create separate menus for their header and footer navigation areas. Or, you might want to offer different menu options on mobile devices than what displays on the desktop version of your site.
To add a page of your website to a menu, you’ll need to make sure you’ve published that page.
Publishing New Posts and Pages
We’ve made it to one of the most important parts of this WordPress tutorial for beginners – adding your content!
Your WordPress website is made up of pages and posts. You should use pages to create static content for your website such as a Homepage, an About page, a Contact page, and any legal pages you want to include on your website.
You’ll use posts, on the other hand, to publish new content for your website visitors. This could include blog posts, videos, podcasts, or any other form of content you plan on sharing.
One main distinction between posts and pages is that your posts will display in a list on your website wherever you specify them to. You can control which page your post list displays on by clicking Settings > Reading.
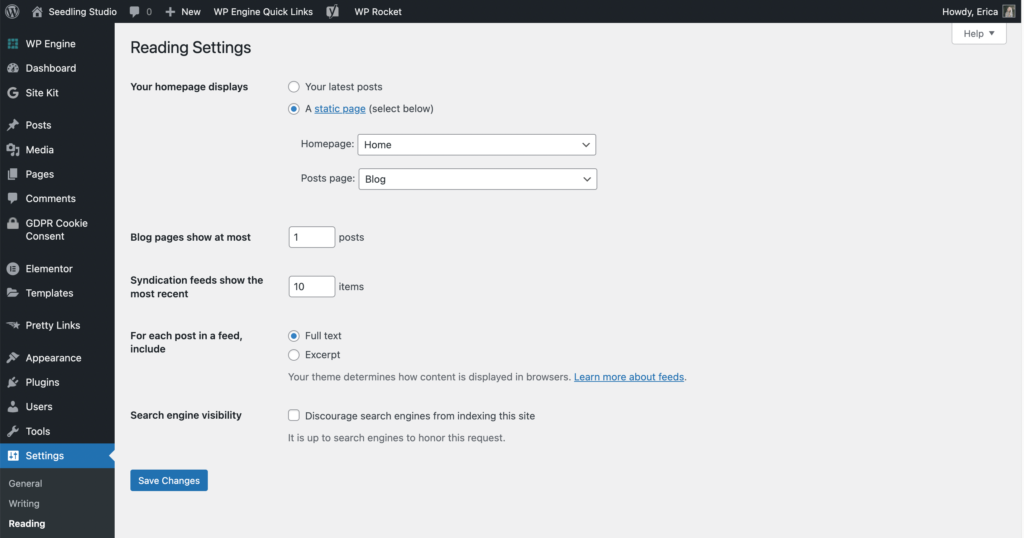
Then, choose a Posts Page from the drop-down menu. Here, you can also specify how many posts you want to display in your post list.
You can create new categories for your posts by navigating to Posts > Categories. This will help keep your content organized, both for you and your readers.
How to Add a New Page in WordPress
To add a new page, simply navigate to Page > Add New.
If you’re using the Divi theme, editing the layout, content, and design of your page is easy! Just click Edit with the Divi Builder, and the page builder will appear.

From there, you can get to designing, or you can use one of Divi’s many pre-built layouts as a starting point for your design.
How to Add a New Post in WordPress
Blogging in WordPress is easy, which is why it’s such a popular option for anyone who plans on creating content in their business.
To add a new post, navigate to Posts > Add New. From there, you can add your post’s title and content.
I recommend writing your post content in a Google Doc before copying and pasting it into WordPress. This helps ensure you have a backup of your work in case you run into any website or internet issues!
After you’ve added your post content, be sure to adjust all the settings in the right sidebar. Assign your post to a category, add any relevant tags, and add a Featured Image. This image will typically appear in your blog post list, at the top of your post, and whenever someone shares your post on social media.
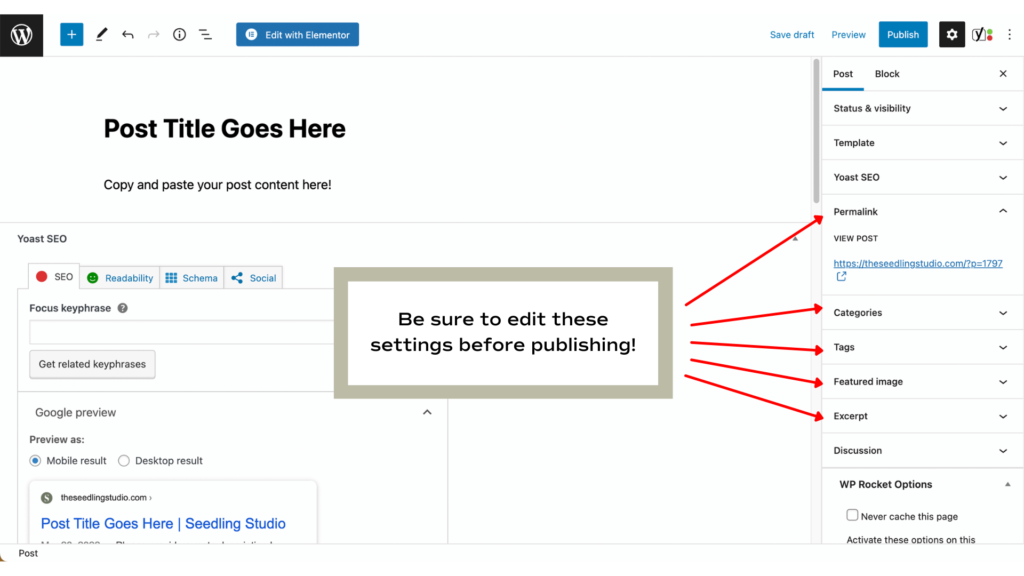
Now, you’re ready to publish! You can save your post as a draft, schedule it to post at a later date, or publish it right away.
There you have it! With the help of this WordPress tutorial for beginners, you now know all the basics of navigating your WordPress dashboard.
WordPress, like any platform, can take some time to learn and get used to. But by going through this WordPress tutorial for beginners, you’re well on your way to managing your website with ease, so you can get back to doing what you do best!
Want to make WordPress even easier to use?
Learn more about the Divi theme!